mong the various new features added to Windows 10 1709 Fall Creators Update, battery saving improvements are widely talked about.
Other than new power slider in the battery flyout, Windows 10 has also got under-the-hood power to prevent apps from putting an extra burden on its shoulders and improve overall battery life of your Windows 10 PC.
The feature is known as Power Throttling
Not every app on your computer requires the CPU at service all the time. Other than the ones people actively use, most of them run in the background where they consume CPU resources.
Windows 10 can reduce the load of such apps and give room to the apps you’re currently using, a feature called Power Throttling. This saves the precious battery of your system from being wasted on unimportant things.
Microsoft has deployed a sophisticated detection system to automatically identify important stuff such as media player, apps running in the foreground, and other demanding apps.
Power Throttling was first introduced to Windows Insiders in April with the release of the Build 16176. Now, Power Throttling is a part of the Fall Creators Update.
Also Read: 12 Easy Ways To Maximize Battery Life On Windows 10
How to enable or disable Power Throttling in Windows 10?
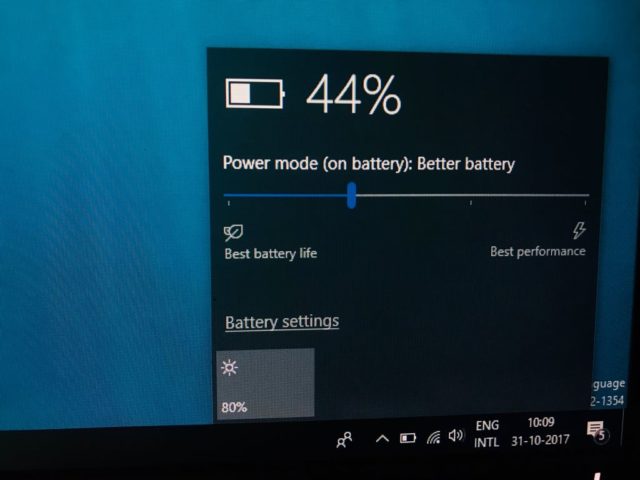
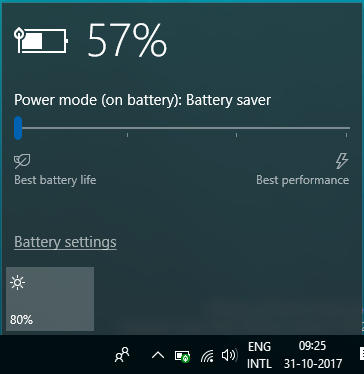
Turning Power Throttling on or off on your Windows 10 PC is as simple as moving the battery flyout’s Power Slider. Setting the power mode to “Battery Saver” or “Better Battery” puts the Power Throttling to work system-wide. You can move the power slider to “Best Performance” and disable Power Throttling.
Check out if it’s working
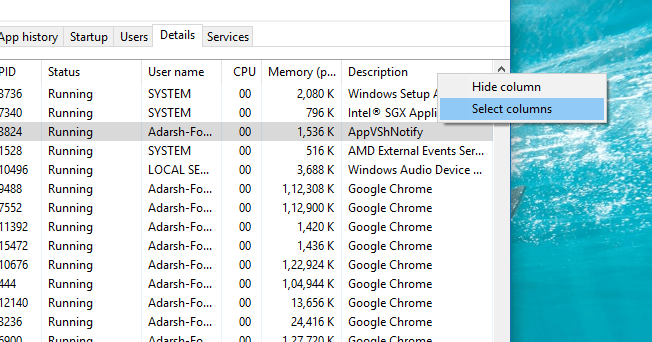
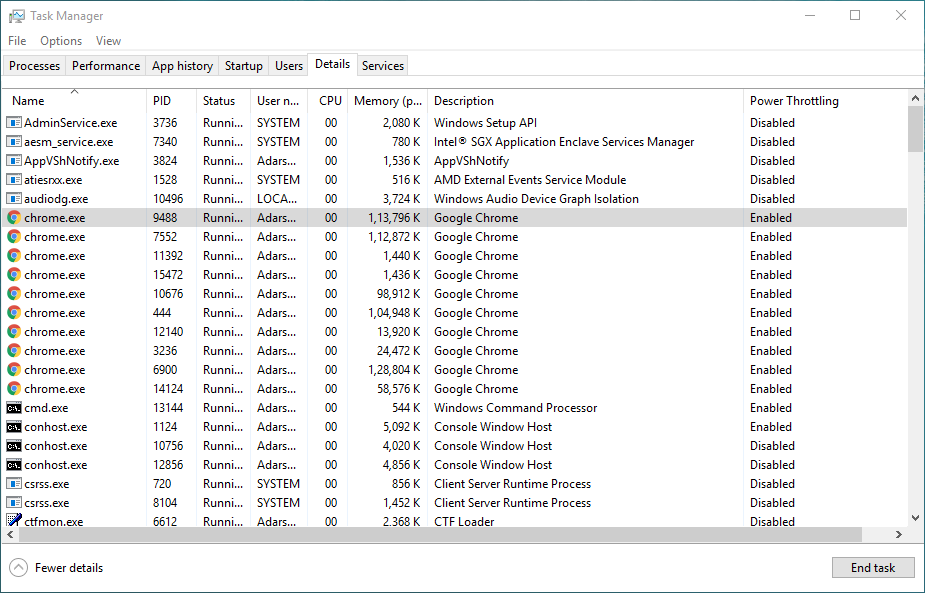
In the Task Manager, you can see what apps are being optimized in Windows 10. Open the Task Manager, and go to the Details tab.
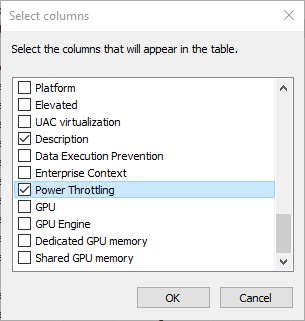
Right-click the headings, click Select Columns, and tick the checkbox that says “Power Throttling” to a new column of the same name. It’ll tell you whether Power Throttling is enabled or not for an app or process.
To see it in action, try to minimize and maximize an app and then take a look at the Power Throttling column.
When can you use Power Throttling?
There is a twist, not every Windows 10 user can take the advantage of Power Throttling. As the feature is developed to improve the battery life of your Windows 10 PC, a physical battery needs to present on the machine.
Power Throttling is disabled by default if you’re running Windows 10 on a desktop or if your laptop is connected to a power supply.
Manage Power Throttling for Individual apps
You can set whether Windows 10 should throttle a particular app or not. This helps in case some apps aren’t that important to you. The other way round, you can enable Power Throttling for an app for which you disabled it earlier.
- Go to Settings > System > Battery.
- Under the heading called Overview, click Battery usage by app.
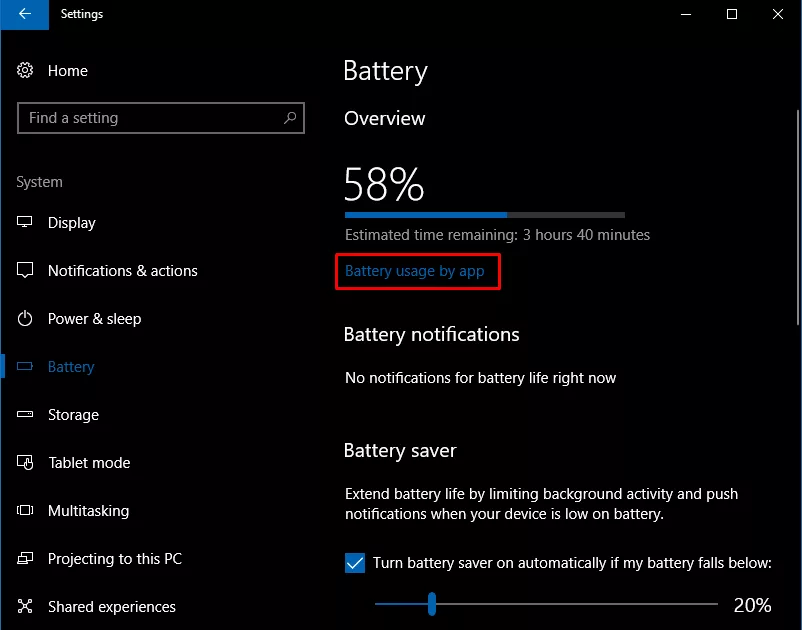
- Now, a list of apps will appear on the screen. Click the one for which you want to enable or disable power throttling.
- Here, untick the checkbox that says “Let Windows decide when this app can run in the background” to display further setting.
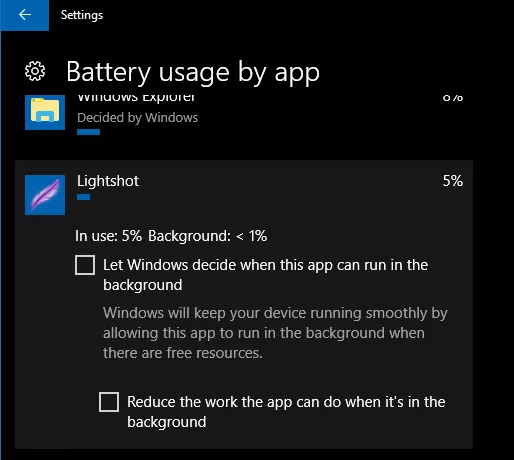
- Untick the checkbox “Reduce the work the app can do when it’s in the background” to turn off power throttling for that app.
You can tick the boxes anytime to enable power throttling for that particular app.
Using power throttling on regular basis can have its advantages. Like, you might be able to improve Windows 10 battery and get extra minutes without slowing down your system.
What are your views on Windows 10’s battery performance? Tell us in the comments.

No comments:
Post a Comment